A 2026 comparative study found that vibrating foam rollers, standard foam rollers, and static stretching all produced similar DOMS reduction in the first 48 hours after intense training. The equipment matters less than the protocol. Most home gym athletes own a foam roller they use for 30 random seconds before deadlifts. This guide covers what actually works.
What Foam Rolling Does
Foam rolling is a form of self-myofascial release — applying sustained pressure to the connective tissue (fascia) and muscle fibers to reduce tension, improve local circulation, and break up areas of restricted movement. The physiological mechanisms are still being refined in research, but the practical outcomes are consistent: reduced perceived soreness, improved acute range of motion, and no negative effect on subsequent strength performance when rolling time per area is kept under 60–90 seconds.
The key variables are pressure, rolling speed, and positioning. Applied correctly, a $35 roller produces the same outcomes as a $200 vibrating option. Applied carelessly, neither tool does much.
Two rules apply to every technique in this guide:
- Roll at one to two inches per second. Slower than feels natural.
- Pause on tender spots for 20–30 seconds. When you find a point of concentrated tension, hold instead of rolling through it.
Choosing the Right Roller
| TriggerPoint GRID 1.0 | RumbleRoller Original 31” | Therabody WaveRoller | |
|---|---|---|---|
| Price | $34.99 | $79 | $149 |
| Surface | Smooth + multi-density zones | Raised textured bumps | Wave-texture foam |
| Length | 13 in | 31 in | 12 in |
| Vibration | None | None | Yes (5 settings + app) |
| Best For | Beginners, all-around use | Intermediate–Advanced | Recovery enhancement |
| Learning Curve | Low | Medium | Low |
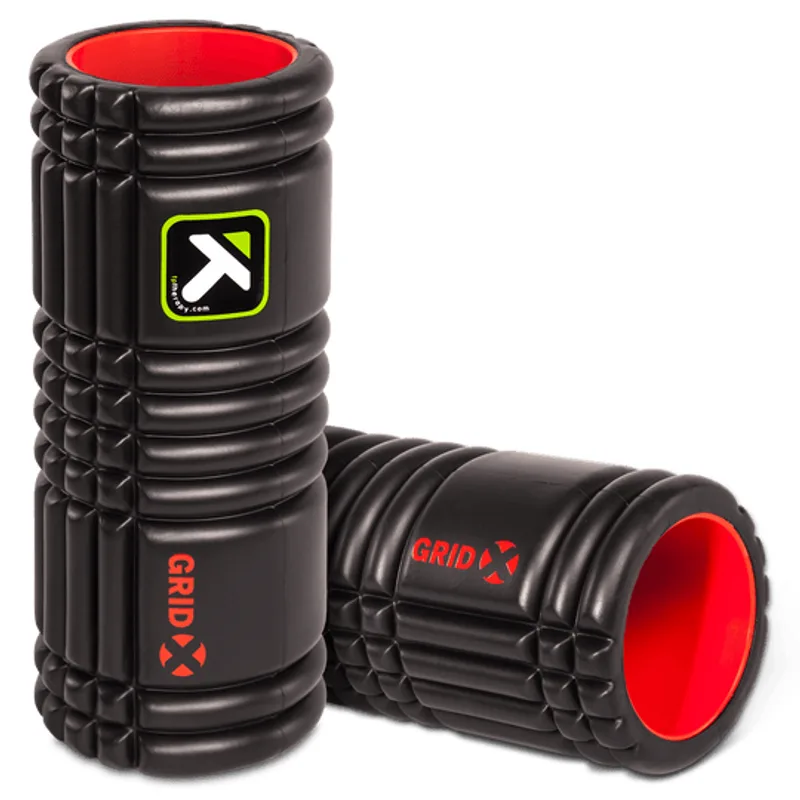
TriggerPoint GRID 1.0 Foam Roller (13-Inch)
Pros
- Three-zone surface (flat, grid, channel) lets you adjust pressure without switching tools
- Hollow rigid core holds shape indefinitely — won't compress flat like cheap foam rollers
- 13-inch compact length forces precise positioning rather than sloppy form on longer rollers
- Free access to online instructional videos with specific muscle-group protocols
- Used in clinical PT settings — technique guides translate directly to real rehab practices
Cons
- 13-inch length requires repositioning to cover full thoracic spine in a single pass
- Firm rigid core is aggressive for complete beginners with significant soreness
- No vibration option — standard pressure only
The TriggerPoint GRID is the most practical starting point. The three-zone surface — flat panels, raised grid sections, and ridged channels — provides more variety than a smooth roller without the aggressive pressure of a textured option. The channel section is specifically designed for spinal rolling: the ridges run parallel to the spine so the vertebrae sit in the groove rather than directly on the roller. Owner feedback consistently points to the included video library as underrated — the protocols map directly to the muscle-group techniques below.
The 13-inch compact length is an advantage for beginners. It forces accurate body positioning rather than allowing you to dump your weight onto a long cylinder and roll randomly.
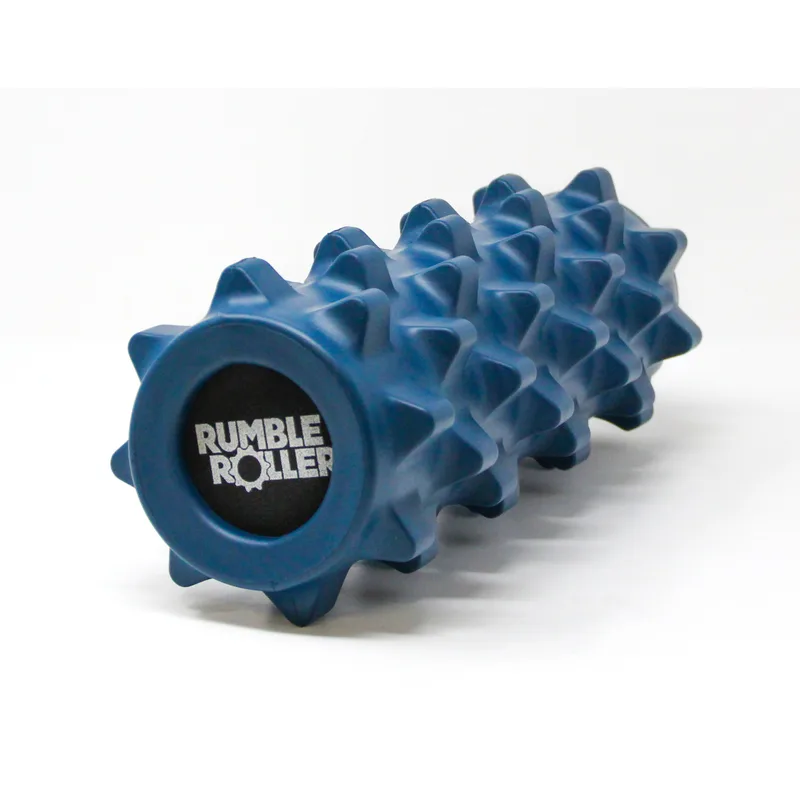
RumbleRoller Original 31-Inch (Blue)
Pros
- Raised bumps apply focused pressure to trigger points without requiring manual effort
- 31-inch length allows full thoracic spine passes without repositioning mid-session
- Original firmness provides meaningfully more pressure than smooth rollers for dense muscle groups
- Targets deeper tissue layers that smooth rollers cannot reach in quads and glutes
- Bumps naturally slow rolling speed — which improves technique and pressure duration by default
Cons
- Not recommended for beginners — bumps are uncomfortable until tissue adapts over a few sessions
- Heavier and bulkier than short rollers, less convenient to store or travel with
- Higher price than a standard foam roller
The RumbleRoller’s patented bumps apply concentrated pressure to small areas — effectively simulating a massage therapist’s thumb rather than the broad contact of a smooth cylinder. According to owner reports, the first two to three sessions are uncomfortable as tissue adapts. After that, athletes report they can no longer get comparable depth from a smooth roller. The 31-inch length is a practical advantage for thoracic spine work specifically: you can travel from mid-thoracic to the upper traps in one pass.
The Original (Blue) firmness is the right starting point for most athletes moving up from a smooth roller. The Extra Firm (Black) is appropriate for athletes with very dense muscle tissue who find the Original insufficient after extended use.
Therabody WaveRoller
Pros
- Five vibration frequencies from gentle activation to deep post-workout recovery
- Therabody app provides guided rolling sessions organized by muscle group and training goal
- Compact 12-inch size delivers targeted pressure more precisely than full-length rollers
- Bluetooth connectivity is reliable; battery handles multiple sessions between charges
- Vibration increases blood flow response compared to static pressure alone, per owner reports
Cons
- $149 price is a significant step up — correct technique on a $35 roller beats careless use of this
- 12-inch length limits full-length muscle group sweeps; better for targeted work than broad coverage
- Requires charging and app setup — more friction than picking up a standard roller
The WaveRoller adds vibration, which owner reports indicate improves blood flow response and reduces the initial discomfort of deep pressure. The five frequency settings allow progression from light activation before training to sustained deep recovery after. The Therabody app provides structured rolling sessions by muscle group and training goal — useful for athletes who want protocol guidance without doing the research.
The 12-inch compact size makes it more precise than a long roller but limits full-length muscle sweeps. Use it for targeted trigger point work and structured recovery sessions, not as a substitute for a longer roller’s broad coverage.
Techniques by Muscle Group
Quads
Position: Face down, roller under one thigh just above the knee. Support yourself on your forearms.
Technique: Roll slowly from just above the knee to the hip crease. Rotate the leg inward to target the rectus femoris (front quad), outward to hit the vastus lateralis (outer quad). Pause 20–30 seconds on areas of concentrated tension.
Duration: 60–90 seconds per leg.
Key cue: Keep your hips level. Dropping one hip shifts pressure to the IT band rather than the quad.
IT Band and TFL
Position: Side-lying, roller under the outer thigh just above the knee. Stack your legs or plant the top foot on the floor for support.
Technique: Roll from just above the knee to the hip joint. The IT band itself is dense connective tissue — the goal is influencing the TFL (tensor fasciae latae) at the top and the tissue attachment points. Moderate pressure only; aggressive rolling on the IT band can increase rather than reduce local inflammation.
Duration: 45–60 seconds per side.
Key cue: When you hit a single point of intense discomfort — typically the proximal or distal attachment — hold for 20 seconds rather than rolling through it repeatedly.
Hamstrings
Position: Seated on the floor, roller under one thigh just above the knee. Use your hands on the floor behind you for support.
Technique: Roll from just above the knee to the sit bone (proximal hamstring attachment). Cross the free leg over the rolling leg to increase pressure. Rotate the leg slightly inward and outward to cover both the medial and lateral hamstrings.
Duration: 60 seconds per leg.
Key cue: The proximal hamstring at the sit bone is the most commonly skipped area — and one of the highest-value spots for athletes with posterior chain tightness from barbell training.
Calves
Position: Seated, roller under one calf just above the ankle. Support yourself on your hands behind you.
Technique: Roll from above the Achilles tendon to just below the back of the knee. Cross the free leg over the rolling calf to increase pressure. Point and flex the foot to work different portions of the gastrocnemius and soleus.
Duration: 60 seconds per leg.
Avoid: Rolling directly on the Achilles tendon. Keep the roller on the muscle belly.
Upper Back and Thoracic Spine
Position: Supine, roller positioned horizontally across the mid-thoracic spine at approximately T6–T8 (level with the bottom of the shoulder blades). Cross your arms over your chest or place hands behind your head.
Technique: With the TriggerPoint GRID, use the channel sections so the spine falls between the ridges rather than directly on the roller. Lift your hips and use your legs to walk the roller up from mid-thoracic to the upper traps. Pause at each spinal level for 5–10 seconds. Extend your upper back over the roller to encourage thoracic extension.
Duration: 60–90 seconds total.
Do not roll: The lumbar spine. Below the rib cage, there is no bony support structure to protect against direct compressive force. Keep the roller on the thoracic spine only.
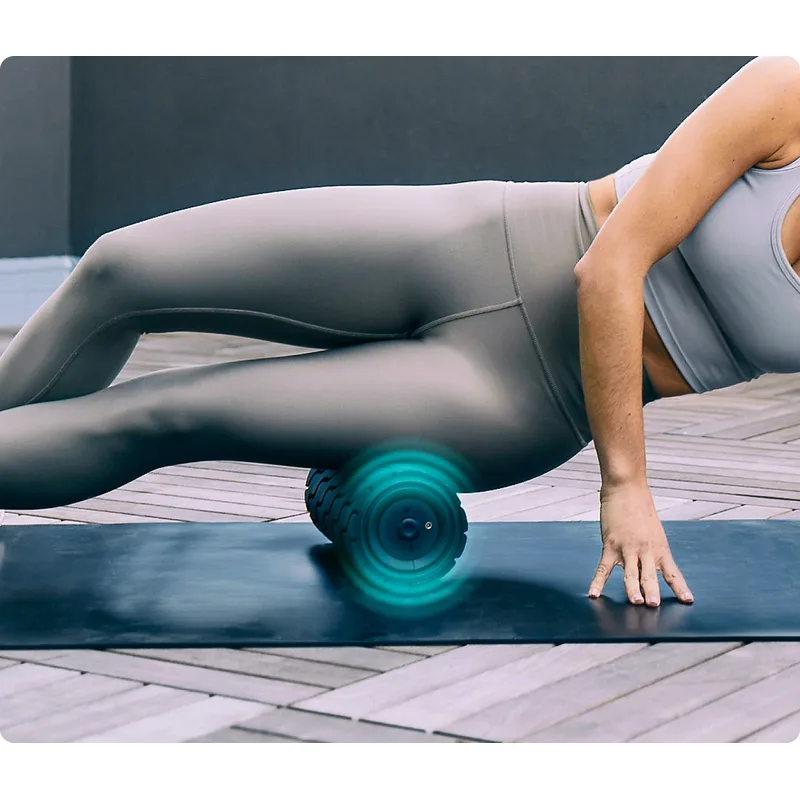
Glutes and Piriformis
Position: Seated on the roller, one ankle crossed over the opposite knee in a figure-4 position. Lean toward the side of the crossed leg.
Technique: Roll from the sit bone toward the hip joint. The piriformis runs diagonally from the sacrum to the greater trochanter — rotating your body slightly forward and back targets different fiber angles. Pause on points of tension.
Duration: 60–90 seconds per side.
Key cue: This is the highest-value rolling area for barbell athletes. Glute tightness directly limits hip hinge mechanics, squat depth, and stride mechanics. Most athletes skip it.
Lats
Position: Side-lying with the rolling arm extended overhead, roller positioned in the armpit beneath the lat.
Technique: Roll from the axilla (armpit) down toward the lower lat insertion. Rotate your torso slightly forward and back to cover the lat-serratus junction. Start with light pressure and increase as the tissue relaxes — this area is dense and sensitive on first contact.
Duration: 45–60 seconds per side.
Hip Flexors
Position: Face down, roller under one hip crease (slightly lateral to center). Support yourself on your forearms.
Technique: Small, controlled movements targeting the psoas attachment zone. This area responds better to sustained holds than to rolling passes — hold on tender spots for 20–30 seconds and breathe through the pressure.
Duration: 30–60 seconds per side.
Pre-Workout vs Post-Workout Protocols
Pre-Workout (5–8 minutes)
Roll each muscle group for 30–45 seconds before training. Focus on the muscle groups you’re about to load. For lower body sessions: quads, glutes, hip flexors, upper back. For upper body sessions: lats, upper back, pec minor (use a lacrosse ball for pec minor against a wall).
Pre-workout rolling at under 60 seconds per area improves acute range of motion without negatively affecting strength performance. Keep sessions brief and targeted — this is activation and range-of-motion prep, not deep recovery work.
Post-Workout (10–15 minutes)
Post-workout is the primary window for foam rolling. Elevated tissue temperature makes sustained pressure more effective. Extend sessions to 60–90 seconds per area. Use the full technique protocols above. This is also when the RumbleRoller or WaveRoller’s enhanced pressure becomes most useful — you’re working with already-pliable tissue and can achieve deeper release.
Based on owner reports and PT protocols, consistent post-workout rolling produces measurable DOMS reduction within two to four weeks of regular practice.
Common Mistakes
Rolling too fast. Moving quickly across tissue provides little benefit. Sustained pressure — not repeated friction — is what drives myofascial release. Slow down.
Avoiding tender spots. Tender spots indicate concentrated tension, exactly where you should pause rather than roll past. Hold 20–30 seconds until intensity drops.
Rolling the lumbar spine. The lower back has no rib cage support. Applying compressive force to lumbar vertebrae with a foam roller is not appropriate. Keep rolling above the lower ribs.
Using a cheap compressible roller. A roller that flattens under body weight applies no meaningful pressure. The TriggerPoint GRID’s rigid hollow core is the baseline requirement — the roller must hold its shape.
Skipping the glutes. Glute rolling is consistently the highest-value area in athlete feedback. Most home gym athletes focus on quads and upper back and skip the muscle group most responsible for squat and deadlift performance.
FAQ
How long should each foam rolling session take? Pre-workout: 5–8 minutes covering the muscle groups you’re training. Post-workout: 10–15 minutes covering all major groups worked. A complete full-body session (8 areas at 60–90 seconds each) takes 12–18 minutes. Daily shorter sessions produce better outcomes than infrequent marathon sessions.
How often should I foam roll? Daily rolling produces better results than 3x per week. The minimum effective dose for DOMS reduction is rolling on training day and the following morning. Prioritize post-workout and the morning after a hard session — those two windows drive the most recovery carryover.
Should I foam roll before or after stretching? Foam roll first. Rolling reduces fascial tension and improves tissue pliability, making subsequent static stretching more effective. The recommended sequence: foam roll → dynamic mobility → training → foam roll → static stretch.
Is there anything I should avoid rolling? Avoid rolling directly over acutely inflamed tissue, varicose veins, open wounds, or bony joints (knees, elbows, ankles). If you have an existing injury, roll the surrounding muscle groups rather than directly on the injury site — releasing tension in neighboring tissue reduces compensatory load on the affected area.
Do I actually need a vibrating roller? No. The 2026 comparative research found similar outcomes between vibrating and standard rolling for DOMS reduction. The Therabody WaveRoller’s vibration adds value for athletes who already roll correctly and want structured app guidance or enhanced blood flow response. For anyone still learning technique, a TriggerPoint GRID used correctly outperforms any vibrating roller used carelessly.
Conclusion
Foam rolling earns its place in the home gym recovery toolkit through consistent, correct application — not through spending more on equipment. The TriggerPoint GRID 1.0 is the right starting point: firm enough to be effective, structured enough to teach correct positioning, and backed by a video library that maps directly to every technique above.
Once standard pressure no longer reaches the depth you need, the RumbleRoller Original unlocks tissue layers that smooth rollers cannot access. For athletes who want vibration-enhanced recovery and guided session protocols, the Therabody WaveRoller adds those capabilities at a justifiable premium.
Top pick: TriggerPoint GRID 1.0. Master the techniques in this guide on a $35 roller before investing in anything else. The equipment is a tool. The protocol is what drives recovery.