Budget home gym builds are more attainable in 2026 than most people expect. Industry trackers estimate that a fully functional strength training setup runs $750–$1,000 when you buy budget-tier new equipment — compared to the $2,000–$5,000 that most full-featured builds cost. The difference is knowing what to spend on and what to skip.
This guide breaks a garage gym build into five phases, each with a specific budget-tier product recommendation and a running cost total. You can stop at any phase and have a functional setup. Complete all five and you’ll have everything needed to run compound strength programs — squats, deadlifts, bench press, overhead press, rows — without a gym membership.
Before You Buy Anything
Two checks before you spend a dollar:
Ceiling height. Power racks typically run 83–90 inches tall. Measure from your floor to the lowest obstruction (door tracks, light fixtures, roof trusses). If you’re under 8 feet of clearance, factor that into rack selection.
Floor condition. Cracked or badly sloped concrete needs attention before you lay rubber. A severely sloped slab will destabilize your rack. Level it with concrete leveling compound ($20–$40 at any hardware store) before flooring goes down.
That’s it. Don’t let space planning become a reason to delay starting.
Phase 1: Flooring — $240 total (4 mats)
Rubber flooring protects your concrete and your equipment. Cast iron plates on bare concrete will chip the floor, rattle the whole structure, and destroy your bars if you ever miss a lift. This is the one phase you cannot skip.
The cheapest functional option is 4×6 rubber mats — the same mats sold for horse stalls at farm supply stores, and the same ones sold as “gym flooring” at a premium markup online.
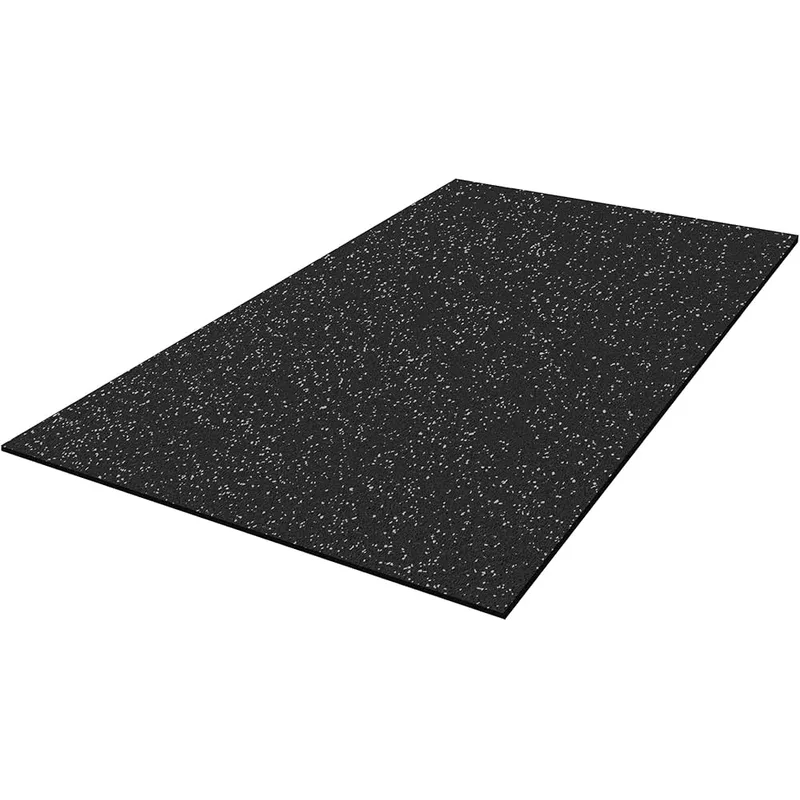
IncStores 4'×6' Premium Rubber Mat
Pros
- Cheapest per-square-foot rubber flooring on Amazon
- Solid slab construction — no seams or puzzle edges to shift under equipment
- Handles deadlift drops, heavy equipment, and rubber wheel traffic without cracking
- Waterproof and easy to clean with a damp mop
- No adhesive or underlayment required on bare concrete
Cons
- Single mat covers only 24 sq ft — need 4+ mats for a full rack footprint
- Heavy at 44 lbs per mat — difficult to move alone once laid
- New rubber odor is noticeable for the first week
For a basic power rack footprint, buy four mats. That gives you 96 square feet — enough for the rack footprint plus a deadlift pull zone in front of it. If you want to add a bench press station or open cardio space, buy six.
Cost checkpoint after Phase 1: ~$240
Phase 2: Power Rack — $120
The rack is your training hub. It enables squats, bench press, overhead press, and rack pulls safely when training alone. Buying the cheapest rack that is actually safe is the correct move here — don’t buy open squat stands when a full cage costs only $30 more.
The CAP FM-905Q gives you a full four-post cage with actual safety pins at every height — not just J-hooks on uprights. The included multi-grip pull-up bar means you don’t need a separate bar purchase. At 500 lb capacity, it handles everything from a beginner starting with the bar to an intermediate squatting 300+ lb.
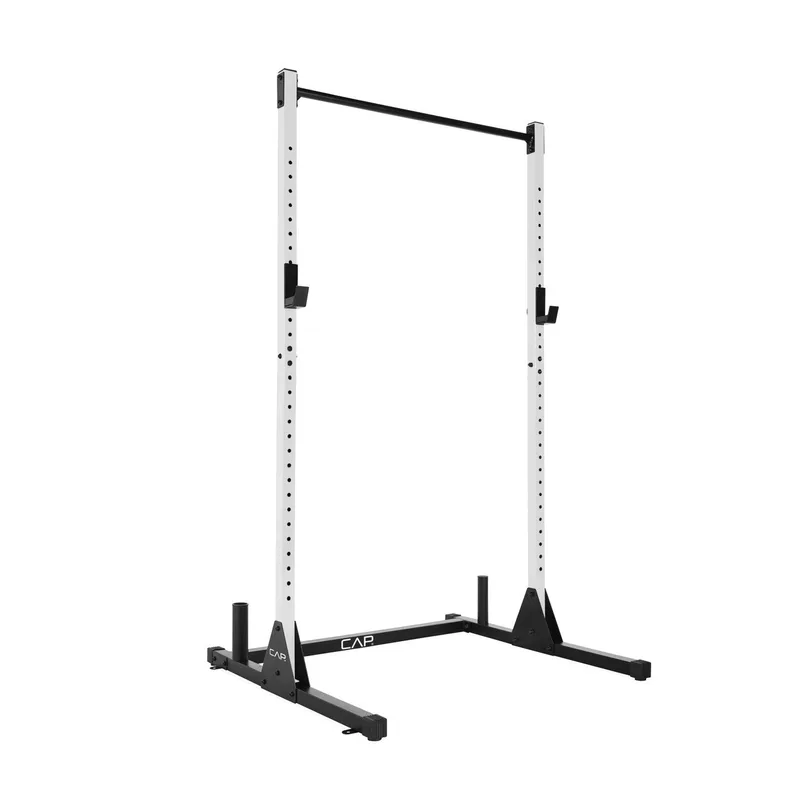
CAP Barbell FM-905Q Color Series Power Rack
Pros
- Full 4-post cage — actual safety pins, not open-frame stands
- Pull-up bar is included at no extra cost
- Multi-color options let you match your garage aesthetic
- 500 lb capacity covers beginner through intermediate compound lifts
- Double-gusseted uprights add rigidity without requiring floor bolts
Cons
- 11-12 gauge steel is thinner than premium racks (Rogue, Titan)
- Smaller attachment ecosystem — few third-party accessories fit
- Chrome J-hooks can scratch barbell knurling over time
- 500 lb capacity is a hard ceiling for advanced powerlifters
Assemble it on your rubber mats. The FM-905Q doesn’t require floor anchoring for normal use, but if you’re pulling the bar off the top of a kipping pull-up, bolt the feet through the mats into the concrete.
Cost checkpoint after Phase 2: ~$360
Phase 3: Olympic Barbell — $110
The bar is the single item where “cheapest available” starts to have real tradeoffs. A sub-$80 bar from an unknown brand can warp, have sleeve wobble that destroys collars, or have inconsistent knurling that makes grip unreliable. Spend slightly more on a bar with a known track record.
The CAP Olympic 7-footer hits the sweet spot. It’s been a staple recommendation for budget home gyms for years because it works reliably across all compound lifts, fits all standard 2” Olympic plates, and holds up to everyday use without issues.
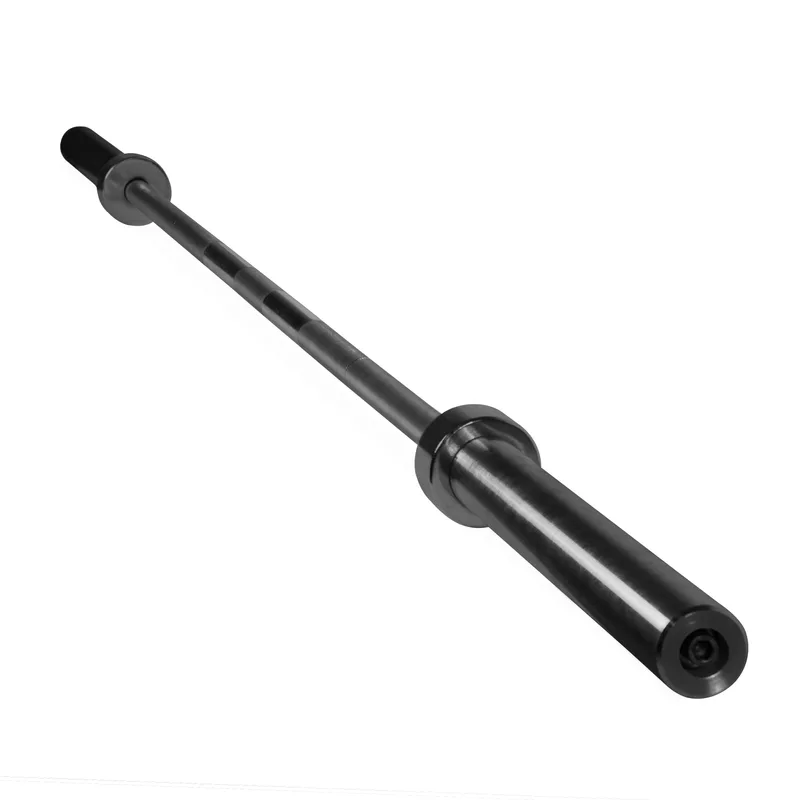
CAP Barbell Olympic 7-Foot Bar
Pros
- 500 lb capacity covers all beginner and most intermediate programming
- Fits all standard 2" Olympic plates
- Knurling is moderate — aggressive enough for grip, gentle on palms
- Works for all major compound lifts without specialty bars
- Consistent Amazon availability unlike many budget competitors
Cons
- Bushing sleeves spin less freely than needle-bearing bars
- No center knurl — less grip security for high-bar back squats
- Lower tensile strength — not safe for Olympic lift drops from overhead
- Basic warranty coverage
One caveat: this bar is not safe for Olympic lifts (cleans, snatches) dropped from overhead. If your goal is CrossFit-style programming with regular drops, save for bumper plates first and use a different bar. For powerlifting-focused programming — squat, bench, deadlift — this bar works fine.
Cost checkpoint after Phase 3: ~$470
Phase 4: Weight Plates — $280
Cast iron grip plates are the budget-correct choice over bumper plates for a beginner setup. Bumpers cost more per pound, wear differently, and are necessary only if you’re dropping the bar from overhead or doing high-volume Olympic lifting. For a squat/bench/deadlift program, cast iron works.
The CAP 300lb grip plate set covers a complete range of increments — from 2.5 lb microplates up through 45s. That range matters: you need 2.5s and 5s for upper-body pressing where weekly weight jumps are smaller, and you need 45s to reach meaningful training loads on squats and deadlifts without stacking dozens of smaller plates.
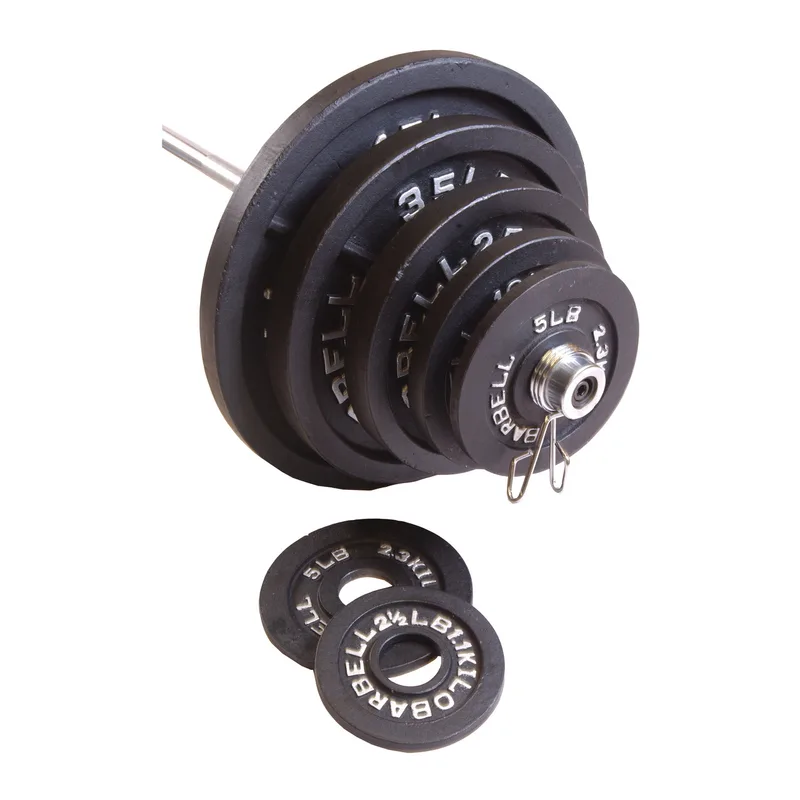
CAP Barbell Olympic Grip Plate Set (300 lb)
Pros
- 300 lbs covers beginner through intermediate programming for all lifts
- Grip-style plates are easier to load and unload than smooth discs
- Cast iron is durable — no delamination, no coating failures
- Full set of increments from 2.5 lb to 45 lb for proper progressive overload
- Includes spring collars so you can start lifting immediately
Cons
- Cast iron (not rubber) — will damage floors or bars if dropped without flooring
- Grip knobs collect dust and debris over time
- Plates are not calibrated — small weight variance between discs is normal
- Takes up significant floor space if not stored on a weight tree
Note: Use these plates ONLY on rubber flooring. Cast iron dropped or set down hard on bare concrete will damage both the concrete and the plate.
Cost checkpoint after Phase 4: ~$750
Phase 5: Adjustable Weight Bench — $120
A flat bench enables bench press, incline work, dumbbell rows, and seated presses. It’s the last piece of the core setup because you can start training squats, deadlifts, and overhead press from Phase 3 onward — but you need the bench for a complete upper body program.
The FLYBIRD Adjustable Weight Bench brings full FID capability to this budget build. With 800 lbs of ASTM-certified capacity and seven incline positions plus a -30° decline, it covers more angle variety than many dedicated incline benches at the same price point. It’s the most reviewed budget bench in its class for a reason.

FLYBIRD Adjustable Weight Bench
Pros
- 800 lb ASTM-certified capacity — higher than most benches at twice the price
- Full FID adjustment — 7 incline positions (0° to 90°) plus -30° decline
- Folds flat for storage — lighter and more compact than non-folding alternatives
- 25,000+ Amazon reviews with 4.4-star average — most verified budget bench in its class
- Ships and stores easily — manageable at 29 lbs versus 40–50 lb non-folding benches
Cons
- Pad width (12") is narrower than commercial benches
- Hinge mechanism requires occasional inspection under consistent heavy loading
- No leg developer or preacher curl attachment
Cost checkpoint after Phase 5 (complete setup): ~$869
What to Buy Used (And What Not To)
Used equipment drops your budget significantly. The places to look: Facebook Marketplace, Craigslist, local gym liquidation sales, and OfferUp. Gyms closing or remodeling sell commercial equipment at significant discounts.
Safe to buy used:
- Plates — cast iron doesn’t wear out
- Dumbbells — same as plates
- Weight benches — inspect the frame welds and pad condition
- Barbells — examine the knurling, check for straight shaft, test sleeve spin
Be more cautious with:
- Power racks — inspect weld quality at all stress points, especially the J-hook crossbars and safety pin mounting points
- Collars — cheap used collars slip; budget $15 for new lockjaw collars regardless
Skip used entirely:
- Rubber flooring — used mats are worn, have permanent equipment impressions, and often smell worse than new ones
- Resistance bands — used bands have unknown fatigue history; a snapped band at full stretch is dangerous
What to Skip (For Now)
Most budget home gym builders overbuy on their first purchase. These items are often in the cart before Phase 1 is complete:
Cardio equipment: Treadmills, bikes, and rowing machines are expensive, take up significant space, and aren’t necessary for a strength-focused program. Save that budget. Walk outside.
Specialty bars: Safety squat bars, trap bars, and curl bars are useful additions after you’ve mastered the movements on a straight bar. They’re not Phase 1-5 equipment.
Cable attachments: Useful eventually. Not useful until you’ve built a base of compound strength and have money left over.
Flooring beyond the rack footprint: You don’t need to rubber the entire garage on Day 1. Lay four mats under the rack, train for a month, and decide if you want to expand.
Budget Comparison Table
| Phase | Item | Cost | Running Total |
|---|---|---|---|
| 1 | Flooring (4× IncStores mat) | $240 | $240 |
| 2 | CAP FM-905Q Power Rack | $120 | $360 |
| 3 | CAP 7-Foot Olympic Bar | $110 | $470 |
| 4 | CAP 300 lb Plate Set | $280 | $750 |
| 5 | FLYBIRD Adjustable Bench | $119 | $869 |
A $869 setup handles the full suite of barbell compound movements: back squat, front squat, bench press, incline bench, overhead press, deadlift, Romanian deadlift, barbell row, and rack pull. That’s a complete training program, not a compromise.
What to Upgrade First (After Phase 5)
Once the core setup is running, the two highest-value additions are:
More plates: 300 lbs fills up fast on deadlifts. Add a pair of 45s ($40–$60) every few months as your lifts progress.
Better collars: Spring clips included with plate sets loosen over time. Lockjaw-style collars ($15–$25 for a pair) stay secure under dynamic loads.
Pull-up bar or rings: The FM-905Q rack already has a pull-up bar. If you want gymnastic rings for dips and body rows, expect to spend $25–$40 for basic wooden rings.
Buying Guide: Where Budget Matters vs. Where It Doesn’t
Spend on flooring. Cheap flooring causes equipment damage, noise issues, and unsafe surfaces. The IncStores mats are the minimum; don’t go thinner or cheaper.
Spend on the bar. A warped or sleeve-wobble bar ruins lifting mechanics. The $110 CAP bar is the floor — don’t go lower.
Save on the rack. The FM-905Q at $120 performs the same core function as a $500 Titan rack for a beginner. Buy up when your strength demands it — not before.
Save on the bench. The FLYBIRD WB5 at $119 holds 800 lbs and adjusts across eight positions (seven incline plus decline). That’s what you need. Premium foam and wider pads come later.
Save on plates. Cast iron costs less than bumper and performs identically for powerlifting-style work. Upgrade to bumpers only if your programming requires drops.
FAQ
How much does a budget garage gym cost in 2026? A complete five-piece setup — flooring, rack, bar, plates, and bench — runs approximately $850–$950 using budget-tier new equipment. If you buy plates and a bench used, you can get the total under $700.
Is the CAP FM-905Q safe for heavy squatting? Yes, within its 500 lb capacity rating. The four-post cage design with proper safety pin placement makes solo squatting safe. Set your safety pins two inches below the lowest point of your squat before every session.
Can I deadlift on rubber mats without a platform? Yes for controlled sets. The IncStores mats absorb impact well and protect the floor. If you’re doing high-rep touch-and-go deadlifts or dropping from lockout, build or buy a dedicated deadlift platform (two layers of plywood topped with rubber strips) for $50–$80 in materials.
What barbell weight capacity do I actually need? For beginner to intermediate programming, 500 lbs is more than enough. Even advanced powerlifters rarely exceed 600 lbs in training. A 500 lb-rated bar covers 99% of home gym use.
Should I buy a barbell and plates separately or as a set? Separately, in most cases. Barbell sets bundle bars and plates at a fixed ratio — you end up with more plates than you need at first, and the bar quality in combo sets is often lower. Buying separately lets you choose bar quality independently.
What’s the minimum viable setup for getting started? Flooring + rack + bar = $470. You can squat, deadlift, overhead press, and barbell row with that setup. Add the bench when budget allows.
Conclusion
The complete five-phase setup runs under $1,000 and handles any beginner or intermediate strength program. Prioritize in this order: flooring first, rack second, bar and plates third, bench last. Each phase gives you a usable training setup — you don’t need all five to start.
The biggest mistake budget builders make is waiting to start until they can afford everything at once. Phase 1 and Phase 2 together cost $360. That’s a functional bodyweight-plus-light-bar training space. Start there.
Top pick for the budget builder: The CAP FM-905Q at $120 is the best argument for the complete setup — a full four-post cage for the price of open squat stands. Once you have that rack and four rubber mats, every other phase is an add-on.