The home gym market pushed hard into AI-powered machines and connected fitness platforms in early 2026. Most of it is irrelevant for beginners. A subscription-based smart gym doesn’t teach you to squat — and it costs $2,000+ before the monthly fee. The fundamentals of strength training haven’t changed: barbells, plates, a rack, and a bench remain the most effective tools for building strength from scratch, at a fraction of the cost.
This guide covers what to buy first, how much to spend, which programs actually work, and how to lift safely when there’s no coach in the room.
Barbell or Dumbbells: Your First Decision
Most people assume they should start with dumbbells. That instinct is backwards for pure strength development.
Adjustable dumbbell sets top out at 50–90 lbs per hand. A beginner following a linear progression program can exceed that ceiling within 12–18 months of consistent training — sometimes faster on compound lifts. A barbell setup scales indefinitely.
Choose the barbell path if:
- You have a dedicated space of at least 9’ × 9’
- Your primary goal is strength or building muscle efficiently
- You want to follow a proven structured program (Starting Strength, StrongLifts 5x5)
- You plan to train consistently for six months or more
Choose adjustable dumbbells instead if:
- You’re in an apartment with noise restrictions and no dedicated gym space
- You have under 50 sq ft available and can’t accommodate a rack footprint
- Your goal is general fitness rather than maximum strength development
This guide covers the barbell setup. For the dumbbell alternative, see our best adjustable dumbbells guide.
What You Actually Need
A functional beginner barbell gym requires five things. Not ten. Not a cable machine, not a leg press, not a preacher curl station. Five items:
- Power rack — the safety structure that enables solo lifting
- Olympic barbell — the primary training tool
- Weight plates — 300 lbs covers the first 2–3 years
- Adjustable bench — for all horizontal pressing movements
- Rubber flooring — non-negotiable on concrete or wood subfloors
The five products below total approximately $700 for one mat. Buy four mats to cover a full rack footprint and the total reaches $880. That’s a complete barbell gym.
The Rack: Safety Before Features
Never lift heavy alone without a cage. Open squat stands — two posts, no safety pins — have caused serious injuries when lifters fail a rep with no way to get out from under the bar. A full four-post cage with adjustable safety pins is the correct purchase for any solo home gym.
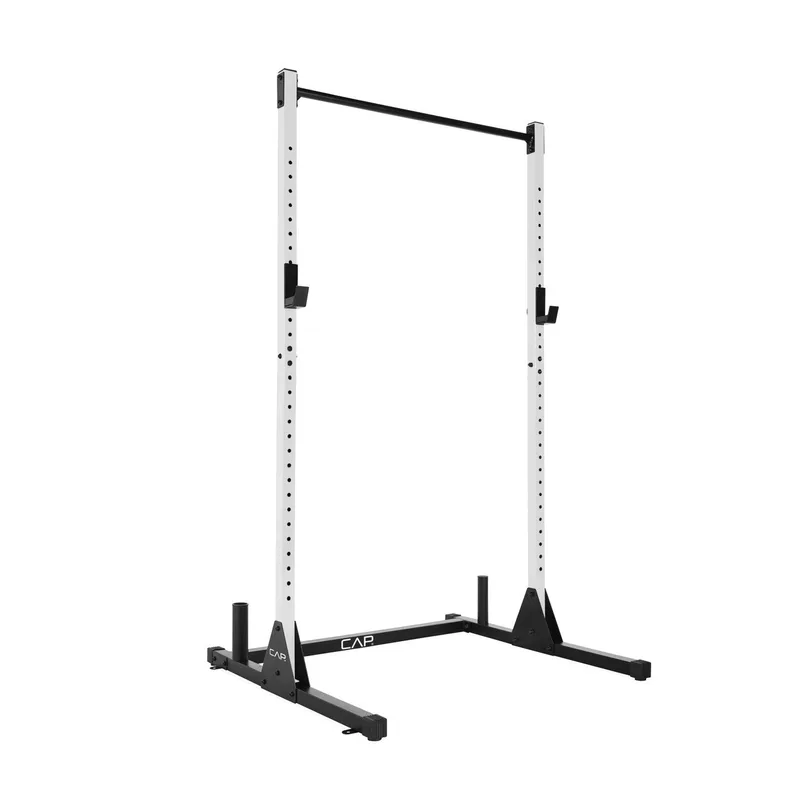
CAP Barbell FM-905Q Color Series Power Rack
Pros
- Full four-post cage with real adjustable safety pins — the only safe option for solo lifting
- Multi-grip pull-up bar included at no extra cost
- 500 lb capacity covers all beginner and most intermediate programming for years
- Cheapest full cage on Amazon with consistent availability
- No floor anchoring required for standard barbell use
Cons
- 11-12 gauge steel is thinner than premium racks — expect more flex at max loads
- Attachment compatibility is limited compared to Rogue or Titan ecosystems
- Chrome J-hooks can develop surface rust without occasional wiping
The CAP FM-905Q delivers a real four-post cage with safety pins at every height. That’s the only feature that matters at this stage. The included multi-grip pull-up bar eliminates a separate accessory purchase. At 500 lb capacity, it handles all beginner programming and most intermediate work.
Setting safety pins correctly: Before each session, set the pins two inches below the bottom of your typical range of motion for that lift. For squat: two inches below parallel. For bench: the height where the bar would rest on your chest if you couldn’t press it. Do one dry run with the empty bar to verify before adding weight.
The Barbell: Spend Here, Not on Extras
The barbell is the piece of equipment you’ll touch every session. A $300 bar doesn’t make a beginner stronger than a $110 bar — but a sub-$80 bar from an unknown brand can warp, develop sleeve wobble, or have inconsistent knurling that creates grip problems.
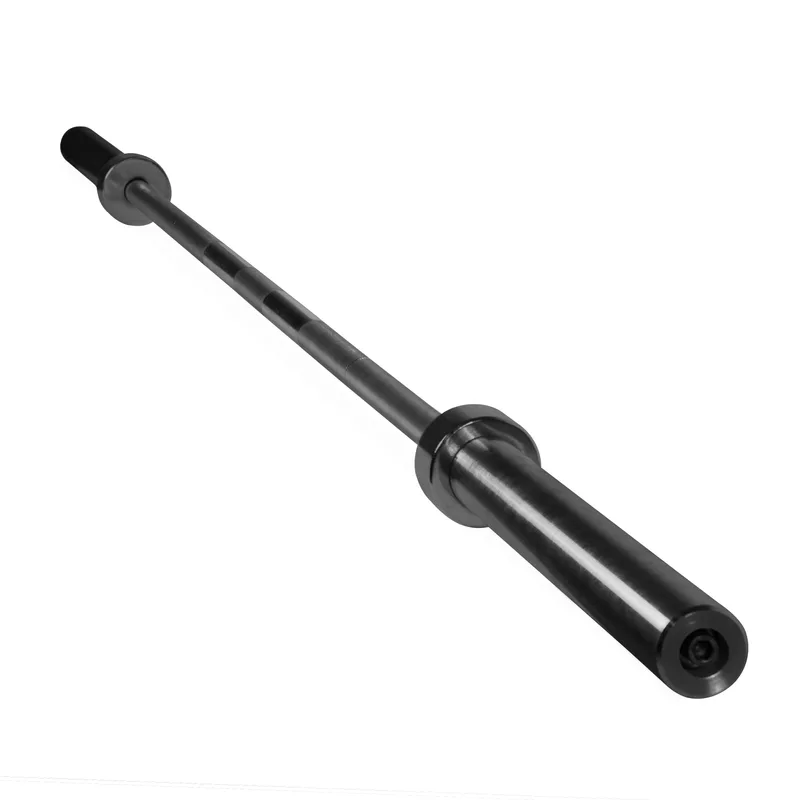
CAP Barbell Olympic 7-Foot Bar
Pros
- Consistent Amazon availability — not a seasonal item that disappears for months
- Fits all standard 2" Olympic plates and barbell attachments
- Moderate knurling suits beginners — enough grip, gentle on untrained palms
- 500 lb capacity won't limit beginner or intermediate programming
- Works across all primary compound lifts — squat, deadlift, bench, overhead press, and row
Cons
- Bushing sleeves spin less freely than needle-bearing competition bars
- No center knurl — reduces grip security for high-bar back squats
- Not rated for Olympic lift drops from overhead height
- Basic warranty with limited manufacturer support
The CAP Olympic 7-Foot Bar has a consistent track record across budget home gym builds. It works for squats, deadlifts, bench press, overhead press, and barbell rows without issues. The moderate knurling is easier on untrained palms than aggressive competition knurling during the learning phase.
One hard rule: don’t drop this bar from overhead with iron plates. Olympic lifts (cleans, snatches) dropped from overhead require bumper plates and a bar rated for impact. For the standard compound lifts in beginner programs, this bar handles everything correctly.
The Plates: Buy Enough From the Start
This is the single most common beginner mistake: buying a small starter set and ordering more plates six months later. Shipping heavy iron costs more the second time. Buy a 300 lb set now.
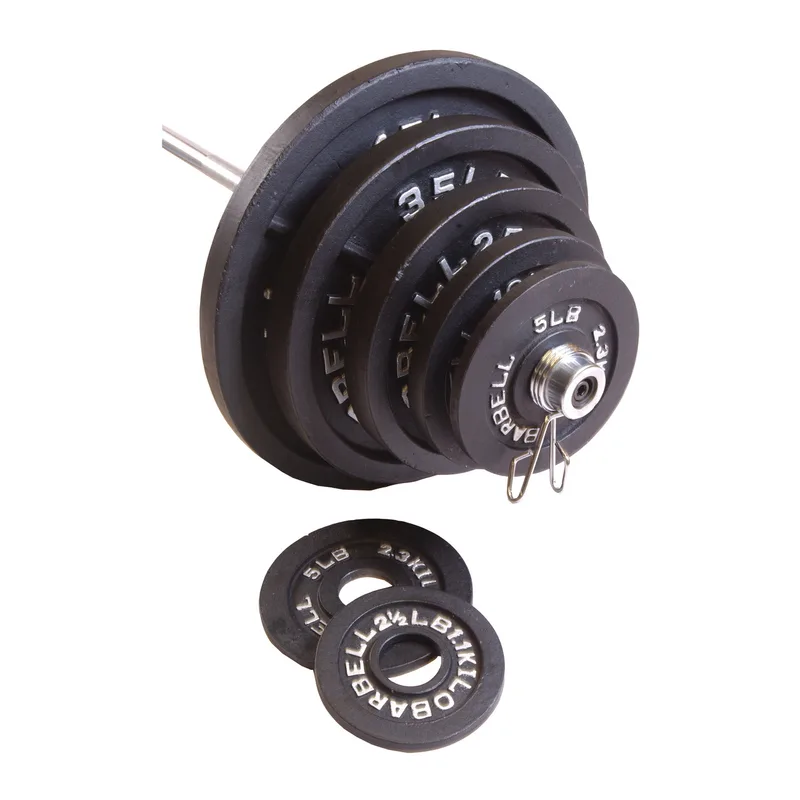
CAP Barbell 300-Pound Olympic Grip Plate Set
Pros
- 300 lbs covers beginner through intermediate programming for all compound lifts
- Grip-style cutouts make loading and unloading plates faster than smooth discs
- Full increment range from 2.5 lb to 45 lb for proper progressive overload
- Includes spring collars — ready to lift immediately out of the box
- Cast iron won't delaminate or develop coating failures like cheaper rubber-coated options
Cons
- Cast iron — chips floors and damages bars if dropped without rubber flooring underneath
- Not calibrated — minor weight variance between plates is normal for cast iron
- Grip cutouts collect chalk and debris over time
- Takes up significant floor space without a weight tree or storage pegs
Beginners following linear progression programs add weight every session. A novice squatter can progress from the 45 lb bar to 225+ lbs within a year of consistent training. 300 lbs of plates means you won’t be bottlenecked by equipment for the entire beginner phase.
The grip-style cutouts load faster than smooth plates — a practical advantage when you’re doing multiple warmup sets and working sets per session. Keep a weight tree or use the rack’s storage pegs to keep plates organized. Stacking iron plates on bare concrete will damage the bottom plate’s knurl over time.
The Bench: Straightforward
Your first bench doesn’t need decline attachments, leg developers, or preacher curl add-ons. It needs to be stable, flat, and rated for the weight you’ll load it with.
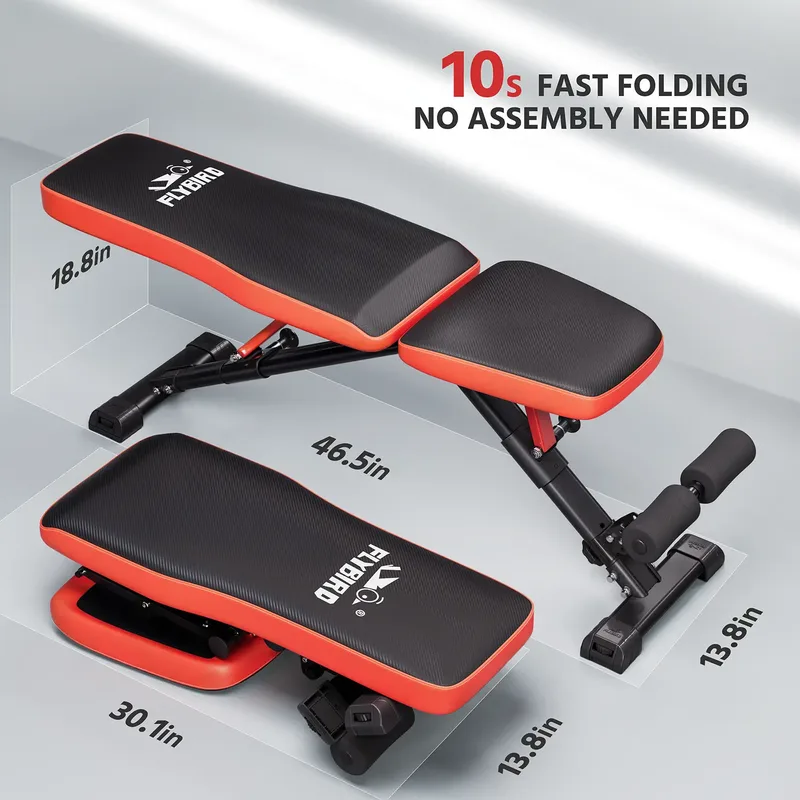
FLYBIRD Adjustable Folding Weight Bench
Pros
- 800 lb rated capacity — highest in its price class and well above what any beginner will load
- Ships pre-assembled — unfold and use immediately, no hardware or instructions required
- Folds to 9 inches tall for wall or under-bed storage between sessions
- Six incline positions cover flat, low incline, mid incline, high incline, and upright press
- Decline setting available for decline press and sit-up variations
Cons
- 15.7" seat width is narrower than commercial benches — can feel less stable for very wide grip pressing
- No leg developer or preacher curl attachment available
- Hinge area collects sweat — needs occasional wipe-down to prevent corrosion
The FLYBIRD adjustable bench ships pre-assembled — unfold it and it’s ready. The 800 lb rated capacity is the highest in its price range. Six incline positions cover every pressing angle in standard programming. When not in use, it folds to 9 inches thick and stores flat against a wall.
Safe solo bench press setup: Position the bench inside the cage with the bar loaded on the j-hooks. Set safety pins two inches below chest height — this is where the bar lands on a failed rep. Do one unloaded dry run to verify pin height before adding plates. This is the only safe way to bench press alone.
The Flooring: Not Optional
Cast iron plates on bare concrete chip the floor, create noise, and will damage your plates and bar if you ever miss a lift. Rubber flooring is non-negotiable for any home gym with iron weights.
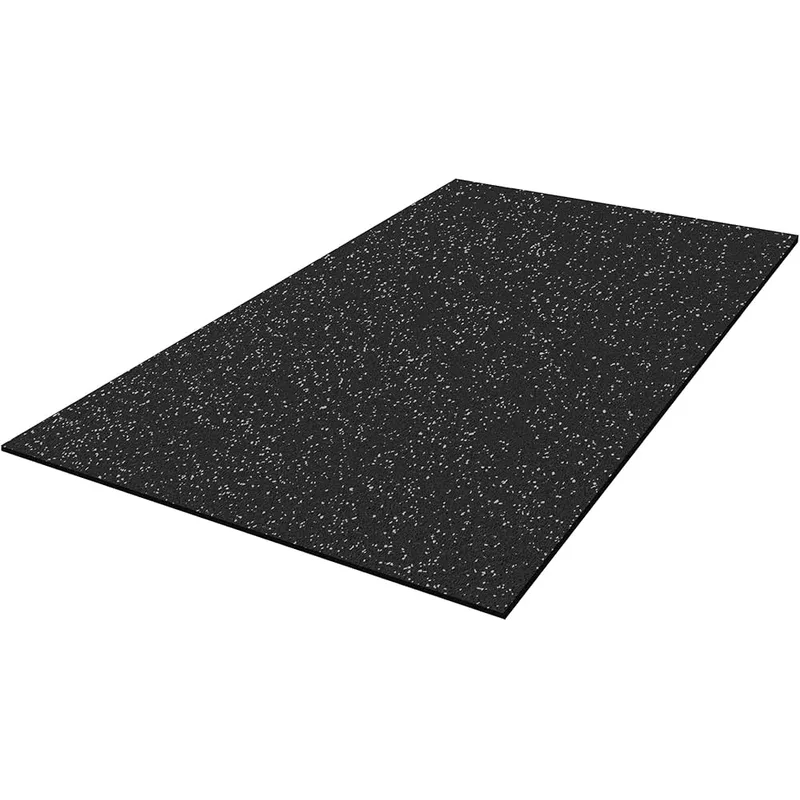
IncStores 4'×6' Premium Rubber Mat
Pros
- Lowest cost-per-square-foot rubber flooring on Amazon
- Solid slab construction — no seams or interlocking edges to shift under equipment
- Handles dropped iron plates, heavy rack feet, and equipment wheels without cracking
- Waterproof and easy to clean with a damp mop or wet rag
- Lay directly on concrete — no underlayment or adhesive needed
Cons
- One mat covers only 24 sq ft — need four or more for a full rack footprint
- Heavy at 44 lbs per mat — positioning takes two people for a clean layout
- New rubber odor is strong for the first week
Buy four mats for a standard power rack footprint. That covers the rack’s base plus a pull zone in front for deadlifts. Six mats adds room for a dedicated bench press station with walkout space. Unroll mats 24–48 hours before use and air them out — the rubber smell fades quickly.
The IncStores mat is the most cost-effective rubber flooring on Amazon. Solid slab construction means no edges to lift or shift under heavy equipment loads.
Your First Program
The equipment is straightforward. The program determines whether you actually get stronger.
Two programs account for the majority of documented beginner strength gains:
Starting Strength
Developed by Mark Rippetoe. Three days per week — typically Monday, Wednesday, Friday. Two alternating workouts:
- Workout A: Squat, Press, Deadlift
- Workout B: Squat, Bench Press, Power Clean
Most exercises: 3 sets × 5 reps. Add weight every session as long as you complete all reps. The focus is on learning and reinforcing correct movement patterns while adding weight systematically.
Best for: Complete beginners with no prior barbell experience who want a structured, coach-designed system. The Starting Strength book covers technique in depth and is worth buying.
StrongLifts 5x5
Three days per week with two alternating workouts:
- Workout A: Squat, Bench Press, Barbell Row
- Workout B: Squat, Overhead Press, Deadlift
Most exercises: 5 sets × 5 reps (deadlift: 1 set × 5 reps). Add 5 lbs per session for lower body lifts, 2.5 lbs for upper body lifts. Free app available for tracking.
Best for: Beginners who’ve done some prior training and want more total volume per session, or those who prefer not to do the power clean.
The critical rule for both programs: Do not switch programs mid-run. Pick one and complete 12–16 weeks before evaluating. Program-hopping before you’ve run a program to completion is the most common reason beginners stall.
Safety Fundamentals
Three rules that prevent the majority of beginner injuries:
Learn the movement before loading it. Spend your first 2–4 sessions doing every compound lift with the empty bar (45 lbs). The squat, deadlift, and bench press are technical movements. Adding weight before the pattern is consistent is how people get hurt. Record yourself from the side during this phase — form breaks down in ways you can’t feel.
Always set the safety pins. Before every session, every lift. Not sometimes. Safety pins are only useful if they’re in position before you need them. This takes 15 seconds and eliminates the most dangerous failure mode in solo home gym training.
Progress conservatively on upper body lifts. Adding 5 lbs per session on squats and deadlifts is sustainable for months. Adding 5 lbs per session on bench press or overhead press stalls faster. The programs above prescribe 2.5 lb jumps on upper body lifts — follow that recommendation precisely.
When to Add Equipment
After 3–4 months of consistent training, identify what’s actually limiting your progress before buying anything new. Most common additions at that stage:
- More plates — if you’re approaching the limit of your starting set on squats or deadlifts
- Fractional plates (0.25–1.25 lb) — when 2.5 lb jumps become too large for overhead press or bench press
- Lat pulldown attachment — adds vertical pulling without a separate machine; fits most 2” × 2” racks
- Chalk — magnesium carbonate chalk ($10–15) improves deadlift grip dramatically once weights get challenging
Don’t buy supplementary equipment until you’ve identified a specific gap in your training. Buying more gear before running the program consistently enough to know what you need is a waste.
Buying Guide
Space requirements:
- Minimum functional setup: 8’ × 9’ (rack footprint plus deadlift clearance)
- Comfortable working space: 10’ × 12’ (adds bench station and room to walk around)
- Ceiling clearance: 8’+ for standard racks; measure before buying and account for door tracks or light fixtures
Budget breakdown:
| Item | Budget Pick | Price |
|---|---|---|
| Power rack | CAP FM-905Q | $120 |
| Olympic barbell | CAP 7-Foot Bar | $110 |
| 300 lb plates | CAP Grip Plate Set | $280 |
| Adjustable bench | FLYBIRD Folding Bench | $130 |
| Flooring (4 mats) | IncStores 4’×6’ | $240 |
| Total | $880 |
Buying used: Check Facebook Marketplace and Craigslist before buying any rack or plates new. Power racks depreciate fast — gyms that closed during the early 2020s still have equipment circulating in the used market. A $250 rack often sells used for $80–100. Plates: buy at or below $0.75/lb used. Barbells: inspect for a straight shaft and freely-spinning sleeves before buying used.
What to skip in year one:
- Cardio equipment
- Machine attachments before mastering barbell movements
- Specialty bars (trap bar, safety squat bar) until you’ve run 6+ months of basic programming
FAQ
How much does a beginner home gym cost? A functional barbell setup with budget-tier new equipment — rack, bar, 300 lb plates, bench, and four rubber mats — runs approximately $880. Buying the rack and plates used brings that to $500–600.
Can I build real muscle with just a barbell and these four lifts? The squat, deadlift, bench press, overhead press, and barbell row work every major muscle group. Lifters have built significant lean mass on barbell-only programs for decades. Cables, machines, and dumbbells add variety — they don’t replace the fundamentals.
What’s the difference between a squat rack and a power rack? A squat rack is an open two-post design. It holds the bar for loading and unloading but has no safety mechanism to catch a failed rep. A power rack (or cage) is a four-post structure with adjustable safety pins — essential for solo lifting on squats and bench press. Always buy the cage for home gym use.
How quickly do beginners get stronger? On a linear progression program, most beginners see measurable strength increases within 2–3 weeks. Significant visible muscle changes typically appear at 8–12 weeks with consistent training and adequate protein intake (0.7–1g per pound of bodyweight per day).
Do I need bumper plates instead of iron plates? Not for standard beginner programming. Bumper plates are required for Olympic lifts (cleans, snatches) dropped from overhead. For squats, bench press, overhead press, and deadlifts, cast iron plates work correctly — and cost significantly less per pound than bumper plates.
Conclusion
The most common beginner mistake is over-researching equipment and under-committing to a program. The five items above give you everything required to run Starting Strength or StrongLifts 5x5 for two to three years before outgrowing anything.
Best starter rack: CAP FM-905Q — the lowest price for a real cage with functional safety pins.
Best complete setup for under $900: Rack + Bar + 300 lb Plates + FLYBIRD Bench + four IncStores mats = a full barbell gym.
Pick a program. Get on it. The equipment is the easy part.