Garage gym flooring projects are at a high point in 2026 as more home gym builders move past the “just throw down some horse stall mats” approach and into permanent installations. The difference between a correctly installed rubber floor and one that shifts, curls, or holds moisture underneath can be the difference between a gym that lasts five years and one that requires a full redo in eighteen months.
This guide covers the complete installation process for rubber flooring rolls and interlocking rubber tiles — the two formats used in the vast majority of home and garage gym builds. It also recommends the three most reliable rubber flooring products currently available on Amazon, with specific notes on which installation method each one suits best.
Quick Comparison
| Spec | IncStores 3/8" Heavy Duty Rubber Flooring Roll 4x10 | Grytfit Interlocking Rubber Floor Tiles (4-Pack, 22.5" x 22.5") | American Floor Mats 3/8" Heavy Duty Rubber Roll 4x10 |
|---|---|---|---|
| Rating | 9.0/10 | 8.5/10 | 8.8/10 |
| Price | Unavailable | $104.99as of Oct 18, 2026 | $183.67as of Oct 18, 2026 |
| Thickness | 3/8" (9mm) | 1/2" (12mm) | 3/8" (9mm) |
| Coverage per roll | 40 sq ft (4' × 10') | — | 40 sq ft (4' × 10') |
| Material | Recycled rubber | 100% recycled rubber | Commercial-grade recycled rubber |
| Color options | Black, color fleck variants | — | — |
| Installation | Loose-lay or adhesive | — | — |
| Weight per roll | ~65 lbs | — | — |
| Tile size | — | 22.5" × 22.5" | — |
| Coverage per 4-pack | — | ~14 sq ft | — |
| Color | — | Gray Fleck or Black | Solid black |
| Weight per tile | — | ~10 lbs | — |
| Warranty | — | — | 5 years |
| Origin | — | — | Made in USA |
| Check Price → | Check Price → | Check Price → |
Prices change daily — tap Check Price for the current Amazon price. Numbers shown were verified on the "as of" date.
The Two Installation Methods
Rubber gym flooring comes in two formats, and the right choice depends on your space and how permanent you want the installation to be.
Rubber rolls cover large areas efficiently with minimal seams. A 4’×10’ roll covers 40 square feet. For a two-car garage (roughly 20’×20’ = 400 sq ft), you’d need about 10 rolls. The advantage is a near-seamless surface and lower cost per square foot. The trade-off is heavier individual pieces and the need for a utility knife to cut borders.
Interlocking tiles interlock like puzzle pieces and require no adhesive. Each tile is typically 2’×2’ to 2’×2.5’. They’re ideal for smaller spaces, irregular floor plans, or builders who want the option to reconfigure or relocate the floor later. Installation is faster but more expensive per square foot.
Quick decision rule:
- Regular rectangular garage or basement with 200+ sq ft to cover → rubber rolls
- Irregular space, partial coverage, or frequent layout changes → interlocking tiles
- Budget is a concern → rolls are almost always cheaper per square foot
IncStores 3/8” Heavy Duty Rubber Roll 4x10
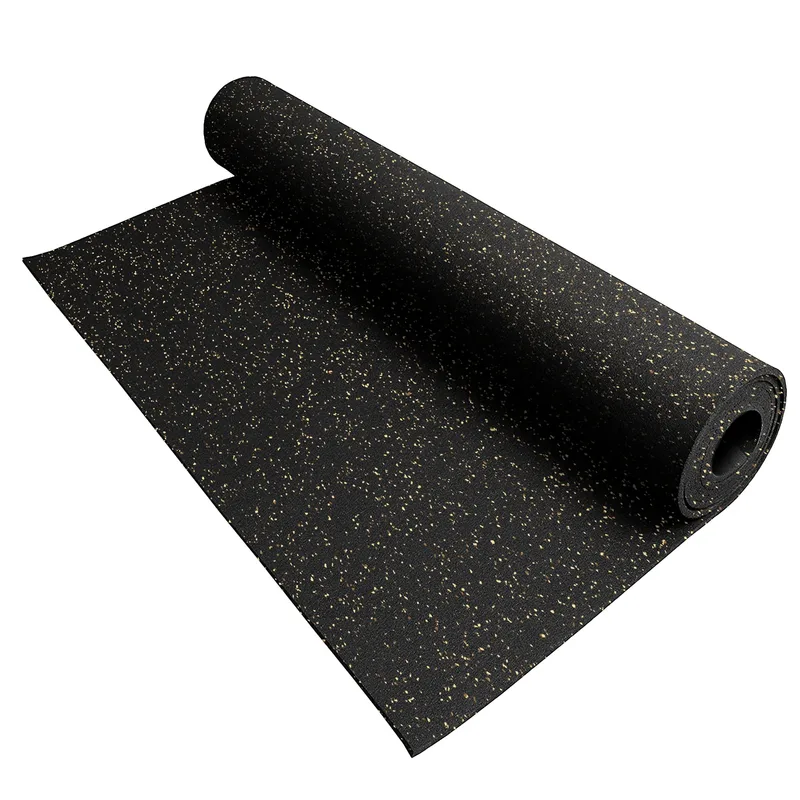
IncStores 3/8" Heavy Duty Rubber Flooring Roll 4x10
Pros
- Covers large areas efficiently with minimal seams
- Flexible enough to cut with a utility knife and straight edge
- Handles barbell drops, equipment weight, and high-impact cardio without denting
- Low-profile seams lie flat when rolls are butted tightly together
- Acclimation takes only 24–48 hours before install
Cons
- Heavy at ~65 lbs per roll — two people make installation much easier
- Roll curl requires proper acclimation before laying flat
- New rubber odor can be strong for the first 1–2 weeks
IncStores produces some of the most consistently reviewed rubber flooring on Amazon, and the 3/8” heavy duty roll is the format most garage gym builders end up with after weighing cost, durability, and installation difficulty. The 4’×10’ size is practical — wide enough to cover significant floor area per roll while still manageable to move through standard garage doors and down basement stairs.
At 3/8” thick, it handles cardio machines, squat racks, barbells, and typical free weight usage without issue. If you’re planning heavy Olympic lifting with barbell drops from overhead, consider a 3/4” mat or deadlift platform on top of this base layer. For most strength training programs — squats, bench, rows, deadlifts from the floor — 3/8” is sufficient.
The biggest installation consideration with rolls is acclimation. Unroll these in the room where they’ll be installed for at least 24 hours before your layout session. Rolls shipped in cold weather need 48+ hours. Trying to force-flat a cold, newly-opened rubber roll leads to edges that curve up at seams.
Grytfit Interlocking Rubber Floor Tiles (4-Pack, 22.5” x 22.5”)
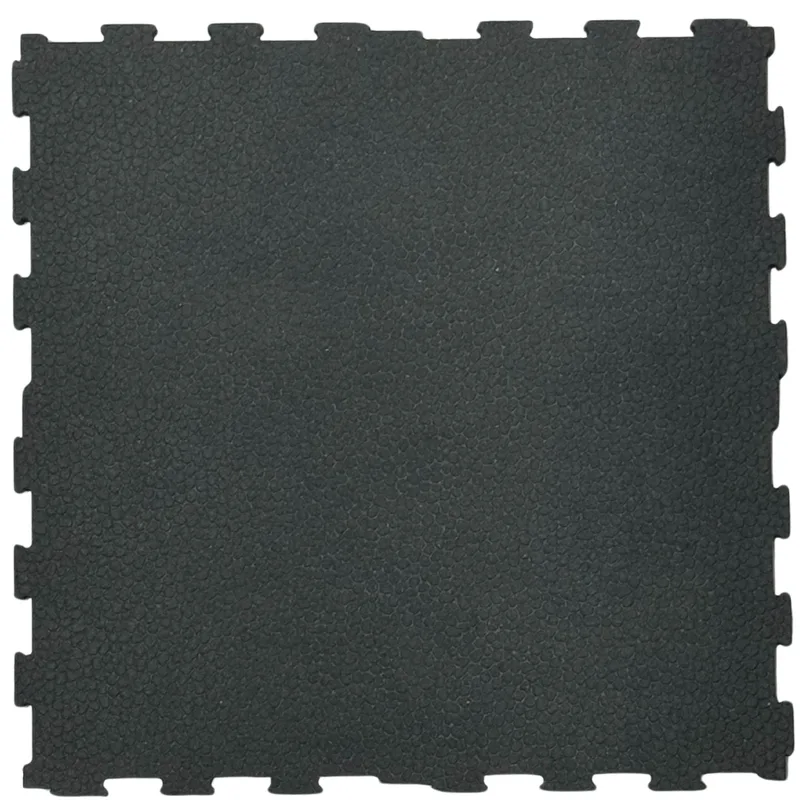
Grytfit Interlocking Rubber Floor Tiles (4-Pack, 22.5" x 22.5")
Pros
- No cutting required for most standard room configurations
- Puzzle-lock interlocking edges eliminate shift under heavy equipment
- Thicker at 1/2" — better impact absorption for Olympic lifting and drops
- Easy to reconfigure or move to a new space
- Individual tiles replaceable if one section gets damaged
Cons
- More expensive per square foot than rubber rolls
- Border and edge cuts still require a utility knife for wall-adjacent rows
- Tile seams are visible — not as clean-looking as a continuous roll surface
The Grytfit tiles are built from 100% recycled rubber — not EVA foam with a rubber coating, which is a common budget shortcut that leads to compression and deformation under heavy equipment within months. At 1/2” thick, these have slightly more cushion than standard 3/8” rubber rolls, which makes them a stronger choice for high-impact training: box jumps, kettlebell swings, and any exercise with dynamic footwork.
The interlocking design uses a precision-fit tongue-and-groove edge rather than the loose puzzle-edge found on foam tiles. Under heavy equipment, this matters — the connections stay tight and don’t separate even when a loaded barbell rolls across the floor. Each 4-pack covers roughly 14 square feet, so plan accordingly when calculating how many packs your space requires.
Edge tiles: the 4-pack includes center tiles. To create a finished border at walls, you’ll need to purchase edge or border tiles separately or cut the interlocking tabs off the outer edge tiles using a utility knife — more on that in the installation section below.
American Floor Mats 3/8” Heavy Duty Rubber Roll 4x10
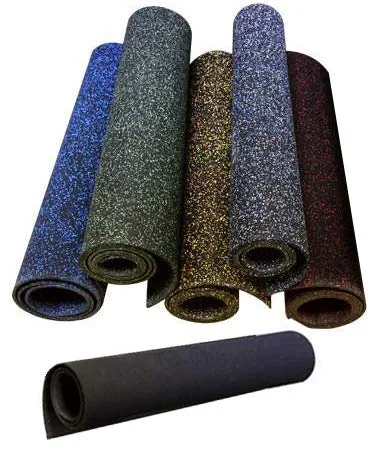
American Floor Mats 3/8" Heavy Duty Rubber Roll 4x10
Pros
- Made in USA with commercial-grade rubber — denser and more consistent than import alternatives
- Non-porous surface is easier to disinfect and resists moisture absorption
- Lies flat quickly with minimal acclimation time
- Solid black surface hides dirt and chalk dust well
- 5-year warranty covers delamination and cracking
Cons
- Higher cost per roll than comparable imported rubber rolls
- Solid black only — no color fleck or contrast options
- Slightly stiffer than softer recycled-rubber rolls — less forgiving for cuts
American Floor Mats is a domestic manufacturer selling gym flooring primarily through Amazon. Their 3/8” rubber roll is denser and harder than most imported recycled-rubber rolls at the same price point — the result of using commercial-grade vulcanized rubber rather than basic recycled buffings.
The practical difference shows in two areas: the surface is non-porous (easier to disinfect, doesn’t absorb chalk, sweat, or moisture from below), and the roll lies flat faster than softer alternatives. For garage gyms in humid climates where moisture wicking into the rubber is a concern, the non-porous surface is a real advantage.
The 5-year warranty is meaningful. Most budget rubber flooring comes with no coverage — if it delaminate or cracks, you replace it at full cost. American Floor Mats covers these failures for five years, which aligns with typical home gym ownership cycles.
Step-by-Step Installation: Rubber Rolls
Tools needed:
- Tape measure and chalk line
- Utility knife with 5+ fresh blades (dull blades tear rubber instead of cutting)
- Metal straight edge or T-square (minimum 4 ft length)
- Rubber mallet or rolling pin
- Knee pads (optional but useful for seaming)
Step 1 — Clean the subfloor. Sweep and mop the concrete. Rubber flooring installed over grit or debris will abrade from below. Let the floor dry completely — at least 24 hours before install.
Step 2 — Check for moisture. Tape a 2’×2’ piece of plastic sheeting flat to the concrete. Wait 24 hours and check the underside. Visible condensation means you have a moisture problem that needs addressing before laying rubber. Unsealed concrete in humid climates often requires a vapor barrier or concrete sealer first.
Step 3 — Acclimate the rolls. Unroll and stack loosely in the room for 24–48 hours. This relaxes the rubber and reduces curl. Cold rubber is stiff and will fight you during installation.
Step 4 — Plan the layout. Snap chalk lines at the center of the room to establish your starting point. For most rectangular garages, running rolls parallel to the longest wall minimizes seams in the highest-traffic areas. Avoid placing a seam directly under a barbell’s land zone for deadlifts — equipment weight will work the seam open over time.
Step 5 — Roll out and position. Unroll from one end of the room. Get each roll roughly in position before trimming.
Step 6 — Cut borders. Use a metal straight edge and fresh utility knife blade. Score first with light pressure, then complete the cut in 2–3 firm passes. Never try to cut through in a single pass — you’ll lose control of the straight edge. For curves or irregular edges (around floor drains, posts), a template cut from cardboard first saves expensive mistakes.
Step 7 — Butt the seams. Push adjacent rolls together firmly. No gap at seams. For most home gyms, loose-lay installation (no adhesive) is sufficient. If your gym has high humidity or a very busy commercial-style usage pattern, perimeter adhesive or double-sided seaming tape adds stability.
Step 8 — Let it settle. Walk the full surface and press down any areas that haven’t gone flat. Most roll curl resolves within 48–72 hours under normal temperatures.
Step-by-Step Installation: Interlocking Tiles
Tools needed:
- Tape measure and chalk line
- Utility knife (for edge cuts)
- Rubber mallet
- Square or T-ruler
Step 1 — Prep and moisture check. Same as rolls — clean concrete, check for moisture, address any issues before installing.
Step 2 — Find your starting point. Unlike rolls, tiles work best starting from the center of the room and working outward. This ensures any cut tiles at borders are equal on opposite walls — a professional-looking finish that eliminates a single narrow strip of cut tile on one side.
Snap chalk lines from the center of each wall. Where they cross is your starting tile position.
Step 3 — Dry-lay the first row. Place tiles without locking them in, working from center outward. This confirms your layout and shows how the border cuts will fall. Adjust if you end up with a border cut smaller than half a tile on one side.
Step 4 — Connect tiles. Starting from the center, press tiles together until the tongue-and-groove connection clicks. Use a rubber mallet on the seam if connections are tight. Do not force connections from the surface — strike at the edge to protect the tile face.
Step 5 — Cut border tiles. For straight borders against walls: measure and mark the cut line, score with a straight edge and utility knife, then complete with multiple firm passes. For removing interlocking tabs on edge tiles: use a utility knife along the tab base for clean removal.
Step 6 — Check alignment every few rows. Tile installations can drift out of square if you don’t verify with a straight edge or chalk line every 3–4 rows.
Buying Guide: What to Look For
Thickness. For most home gym use — squats, bench press, cardio machines — 3/8” is the minimum practical thickness. It protects the subfloor, dampens vibration, and handles plate drops from knee height. For Olympic lifting with full drops from overhead, go to 3/4” total coverage (either 3/4” base or a 3/4” deadlift platform on top of 3/8” base).
Material. Recycled rubber varies widely in quality. Higher-quality recycled rubber uses consistent particle sizes and better binders, resulting in a denser, more uniform product. The easiest field test: push a thumbnail into the surface. Premium recycled rubber shows minimal indentation. Cheap rubber will show a visible dent that doesn’t recover fully.
Coverage math. Calculate your square footage before ordering. Add 10% for cuts and waste. For an 18’×20’ garage gym area (360 sq ft + 10% = 396 sq ft), you’d need approximately 10 rolls of 4’×10’ (400 sq ft). For interlocking tiles at 14 sq ft per 4-pack, that same area requires approximately 29 packs.
Adhesive vs. loose-lay. For residential home gyms with light to moderate use, loose-lay (no adhesive) is the standard approach. Rubber’s weight keeps it in place. Adhesive is justified in high-humidity environments, gyms with heavy foot traffic from multiple users, or commercial applications. If you do use adhesive, use a pressure-sensitive rubber flooring adhesive — standard floor adhesive can off-gas through the rubber and create bubbles.
Subfloor compatibility. Rubber rolls and tiles work on bare concrete without any underlayment or adhesive for most home gyms. They do not work well on carpet — the rubber compresses the carpet pile, creates instability under equipment, and accelerates carpet wear. Remove carpet before installing rubber gym flooring.
FAQ
Do I need to glue rubber gym flooring down? For most home gyms, no. Rubber rolls and thick interlocking tiles have enough mass and friction to stay in place under normal equipment loads. Adhesive is only needed for high-humidity environments, commercial traffic levels, or installations where the flooring is on a slope.
How do I cut rubber flooring rolls? Use a utility knife with fresh blades and a metal straight edge. Score a shallow line first, then make 2–3 progressively deeper passes until the cut is complete. Change blades frequently — dull blades tear rubber and produce ragged edges. For curves, a jigsaw with a fine-tooth blade works well.
How long does the rubber smell last? New rubber flooring typically has a noticeable smell for 1–2 weeks. Ventilate the space during acclimation and the first few days after installation. Higher-quality rubber products and those stored longer before shipping often have less initial odor. The smell is not harmful, but it can be strong in an enclosed garage.
Can I install rubber flooring over existing tile or hardwood? Rubber rolls and tiles can go over existing hard flooring — tile, sealed concrete, hardwood — as long as the surface is clean, flat, and dry. Avoid installing over carpet or any surface with significant flex. If the existing flooring has moisture issues, address those first regardless of what you’re laying on top.
How many rolls do I need for a 2-car garage? A standard two-car garage is roughly 400–480 sq ft. For full coverage with 4’×10’ rolls (40 sq ft each), plan for 10–12 rolls plus one extra for waste on border cuts. Calculate your specific dimensions and add 10% for a reliable total.
Conclusion
Rubber rolls are the better choice for most garage gym builds — lower cost per square foot, fewer seams, and a cleaner finished look. The IncStores 3/8” roll is the standard recommendation: proven construction, consistent availability on Amazon, and a thickness that handles the full range of home gym equipment.
Interlocking tiles make the most sense for smaller spaces, partial coverage (just the platform under a rack), or situations where you want the option to disassemble and move the floor. The Grytfit 4-pack tiles are the strongest interlocking tile option on Amazon at this price, with 100% rubber construction that won’t compress under equipment like EVA foam alternatives.
For builders who want domestic manufacturing and a formal warranty, the American Floor Mats roll is worth the slight premium — particularly for humid garage or basement environments where moisture resistance matters more than initial price.
Pair your flooring with the right subfloor prep — specifically the moisture check in Step 2 — and a rubber floor installed in 2026 will still be in service in 2031 without needing replacement.